 |
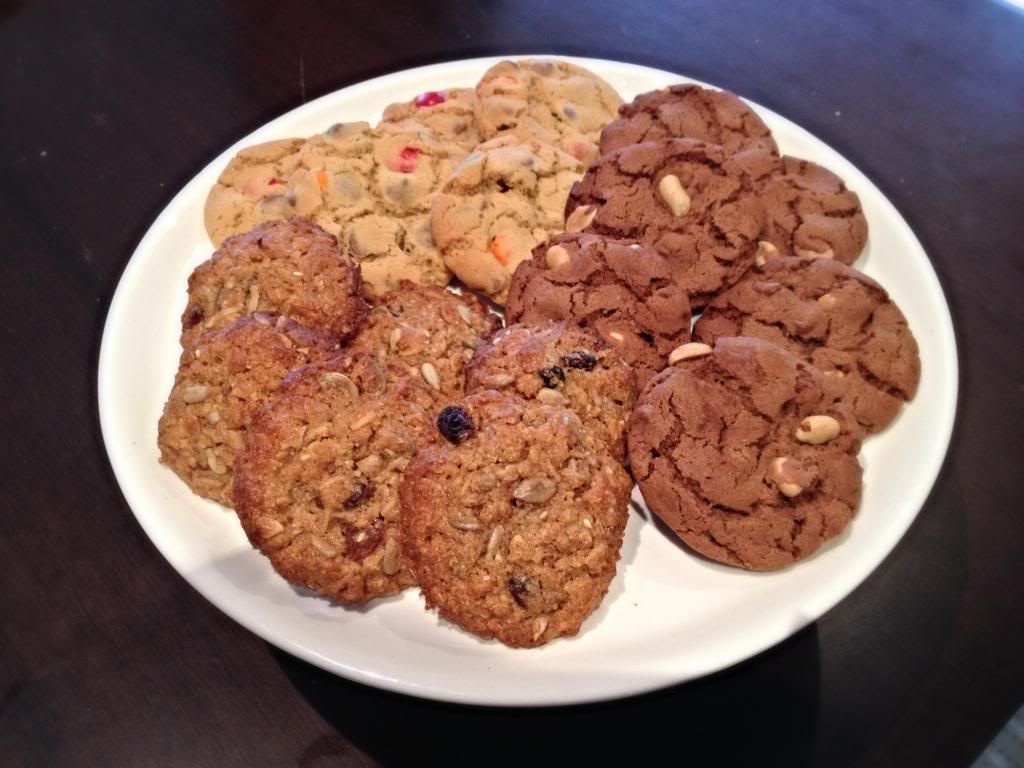
| Left: GF Muesli Biscuit Back: Choc Chip & M&M Cookie Right: Salted Peanut, Pretzel & Chocolate Cookie |
Showing posts with label cookies/biscuits. Show all posts
Showing posts with label cookies/biscuits. Show all posts
Wednesday, 12 March 2014
The BEST Cookie Recipe Ever!!! (and a bonus GF muesli biscuit)

Monday, 17 February 2014
Macaron Madness!
It's no secret I love macarons. I love their versatility and endless flavour combinations. I also love the fact that so many people are afraid of making them so I get lots of requests!
Here are some of the better ones over the last year...
200 of these babies later and I was sorted for Christmas gifts and dessert!
So simple to make - buttercream, a jar of fruit mince and spices.
The wilton sugar decos make all the difference! Recipe thanks to Mr Zumbo. Absolutely delicious!
My new favourite technique - stripes! So easy to do, all you need is a paintbrush and gel dye. Simply grab your piping back and draw stripes of dye from the nozzle to the end of the bag. Place your uncoloured macaron mix in the piping bag and voila! Stripy macarons!
Tasted better than they look!
Stay tuned for more macaron fun this year!
Sarah xx
Here are some of the better ones over the last year...
 |
| L-R Plum pudding, gingerbread, candy cane, pistachio |
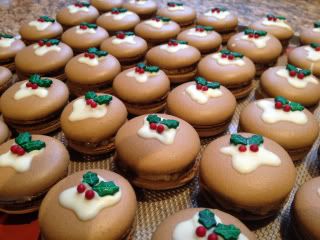 |
| Plum Pudding |
 |
| Gingerbread |
 |
| L-R Salted caramel, fruit tingle |
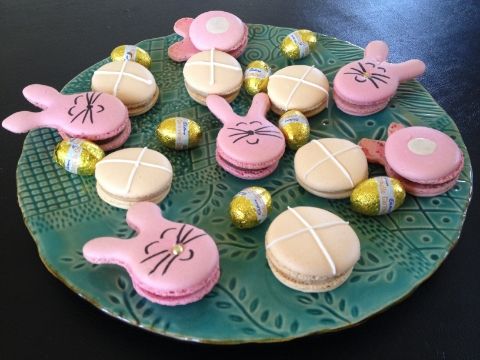 |
| Chocolate, Hot Cross Bun |
The bunnies need a bit more practice this year!
 |
| Strawberry Cheesecake Macarons |
Gobbled down in an instant at work!
 |
| Strawberry Cheesecake filling |
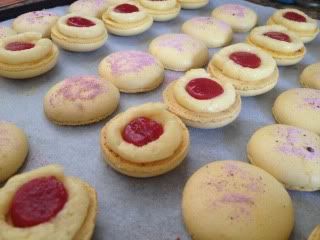 |
| Lemon curd buttercream with raspberry gel |
Stay tuned for more macaron fun this year!
Sarah xx
Tuesday, 25 December 2012
Merry Christmas!
How about a macaron tree?
Pistachio, candy cane, gingerbread and plum pudding flavours.
More macs to come thanks to one of my Christmas presents being Zumbarons!
Sarah xx


Pistachio, candy cane, gingerbread and plum pudding flavours.
More macs to come thanks to one of my Christmas presents being Zumbarons!
Sarah xx
Wednesday, 14 November 2012
The Macaron Showdown: Zumbo Packet Mix vs. Recipe
 |
| L) Packet mix R) Recipe |
I decided to conduct my own little experiment. Make two batches of salted caramel macarons; one from the packet, and one from his recipe book.
 |
| The handy kit, complete with piping bags |

So it all started off fairly simply. Beat one mixture till thick and creamy (pictured above), then add in the sifted almond meal and stir until combined.
 |
| Issue #1: piping without a tip results in wonky circles! |
I don't really have many words to add - the pictures say it all!
But I persevered anyway and made the salted caramel filling. The filling was very easy to prepare and oh-so-delicious!
I scrounged around and found the best, uncracked shells and voila! Here is my result.

Finally the cost. The Zumbo packet mix retails for around $7.50 and I got 11 from it. If you didn't have so many cracked shells You could probably get up to 30. On the other hand it cost me around $10 to make the macarons from the recipe, and this recipe makes 50 macarons. It is much more cost effective to bake from scratch, not to mention the better end product!
So in summary, skip the packet and make them from scratch. It's more cost effective, results in a better macaron and requires a similar skill level. It might take you an extra hour or so due to the extra weighing, and piping all the extra shells but it's well worth it, especially because they freeze so well.
Just make sure you:
 1. Sift the almond meal and icing sugar. Discard anything that doesn't sift through. If you skip this step your shells with be lumpy, not smooth.
2. Beat the macaron mixture more than you think you should - it should be loose and easily slide off a spoon. You aren't making a sponge!
3. Leave your macarons on the bench for at least 30mins so they form a skin before placing in the oven. Alternatively use a hairdryer on a low setting to dry the tops.
Sarah xx
 |
| Issue #2: The shell when still hot, completely stuck to the baking paper, cook it for 2 minutes more and they were overcooked and crunchy. |
 |
| Issue #3: Most of the shells cracked. |
 |
| Issue #4: There is a huge air bubble between the top and bottom of the shell |
I scrounged around and found the best, uncracked shells and voila! Here is my result.
 |
| Definitely not professional quality! |
Most of the macarons appeared overcooked. Even after leaving them in the fridge overnight some of the shells were crunchy ie overcooked. The problem is, when I took the shells out earlier they would not come off the tray. Another thing I noticed was that the shells had a caramel flavouring. I wasn't a huge fan as it smelled and tasted really fake.
Surprisingly the box says that it makes 15 macarons... well I made 11 and ended up eating a whole lot of cracked shells. Considering I did use the circle template supplied to make the correct sized shells, I assume Zumbo's serving size assumes that you will have many failures along the way.
So what about the recipe? Well not surprisingly it worked very well. Shells were perfect, filling was fairly simple to make. The caramel maison was delicious. However, from the picture below you can see that the recipe caramel buttercream is a lot lighter than the packet mix version. This is a result of much more butter. I'm not sure if I made a mistake somewhere along the line but it definitely was not as caramel-y as the packet mix. Next time I will add less butter to the caramel maison in the recipe.

Finally the cost. The Zumbo packet mix retails for around $7.50 and I got 11 from it. If you didn't have so many cracked shells You could probably get up to 30. On the other hand it cost me around $10 to make the macarons from the recipe, and this recipe makes 50 macarons. It is much more cost effective to bake from scratch, not to mention the better end product!
So in summary, skip the packet and make them from scratch. It's more cost effective, results in a better macaron and requires a similar skill level. It might take you an extra hour or so due to the extra weighing, and piping all the extra shells but it's well worth it, especially because they freeze so well.
Just make sure you:

2. Beat the macaron mixture more than you think you should - it should be loose and easily slide off a spoon. You aren't making a sponge!
3. Leave your macarons on the bench for at least 30mins so they form a skin before placing in the oven. Alternatively use a hairdryer on a low setting to dry the tops.
Sarah xx
Thursday, 25 October 2012
Salted Butter Popcorn Macarons

Back in September I had the amazing opportunity to go to Sydney for almost a week. One of the highlights was visiting Zumbo's dessert train at The Star. I absolutely loved the salted butter popcorn macaron so it didn't take much convincing to make a batch at home.
The recipe is in Adriano Zumbo's first book - 'Zumbo' although it is probably in his new macaron book too (which I can't wait to get my hands on!) Take note family, that's a big Christmas present hint!
I'd never tried making Zumbo's macarons before as I have my own tried and true recipe, however I did decide to follow his, which to be honest, was very similar to my own! Same process entirely which made things easy. The ratio of ingredients was slightly different. What I did learn through this recipe, however, was a fabulous 'new' way of making the silkiest buttercream you could imagine. I'm definitely now a convert to this method rather than my usual (simpler) way of beating together icing sugar and butter. Zumbo's method is not gritty in the slightest. You do need to be careful that it does not curdle. I thought mine was ruined until I whisked it a little more and it magically reformed itself!
Anyway these beautiful macarons are for all my lovely dietetic friends whom I have had the pleasure of studying with the the last four years. Tomorrow is going to be such a bittersweet day!
Salted Butter Popcorn Macarons
Adapted from the recipe by Adriano Zumbo
Makes 50
Buttercream
100g caster sugar
38g water
75g lightly beaten egg (about 2 small eggs but you need to weigh)
45g egg yolks (save the yolks from when you separate the whites for the shells!)
200g unsalted butter, softened and cubed.
3g salt flakes
1 bag microwave popcorn butter flavoured
extra melted butter for brushing
100 macaron shells - See here for my recipe I won't write the method for the shells below, just make them a neutral colour ie don't dye them.
Method
Place the sugar and water in a small saucepan and heat on a low heat until the sugar has dissolved. Increase the heat and cook until the mixture reaches 121 degrees.
Meanwhile place the egg and yolks in a stand mixer and whisk to combine.
Once the sugar syrup has reached temperature, remove from heat, turn the speed up on the stand mixer and slowly pour the hot sugar onto the egg mixture. Keep beating for approximately one minute or until the mixture reaches 50 degrees.
With the mixer still running, add the butter, one cube at a time, allowing it to fully incorporate. Keep mixing until it looks uniform and thick.
Fold through the salt - don't beat it in or it may curdle the mixture!
Place in the fridge to firm up a bit.
Cook the microwave popcorn according to instructions. Place half the popcorn in a food processor and process well. Either eat the other half of the packet or make popcorn balls!
With a pastry brush, lightly coat each macaron shell in melted butter then sprinkle with the processed popcorn.
Leave the shells to set for about 5-10 minutes depending on room temperature. By the time you have finished sprinkling the last shell, the first on has probably already set!
Place the buttercream in a piping bag and pipe onto half the shells. Sandwich together with an buttercream-free shell and leave in the fridge overnight to allow the flavour and chewiness to develop.
Bring to room temperature before serving.
As with most macarons, these freeze really well!
Sarah xx
Sunday, 5 August 2012
More Macarons...

I always find it much easier to make a large batch of macs, after all they freeze so well. Given the time that it takes to make them (4 hours start to finish this time!!!), it's definitely worth making a batch.
This time I experimented a little and made four flavours:
Peanut Butter
Milo
Strawberry/Raspberry
Lemon
Wednesday, 27 June 2012
Milo Biscuits

Anyway given my recent obsession with Milo i have been searching for new ways to eat Milo, rather than simply with a spoon. Although i found several recipes for muffins, cupcakes, cake and biscuits, i decided I'd just play around with my tried and tested cookie recipe and see what happened.
This is the recipe that I use for choc chip/M&M/white choc & macadamia cookies. However, when adding Milo instead of chunky bits it resulted in a fairly crunchy biscuit. I think this is due to the high sugar content of the Milo. Maybe next time I need to reduce the caster sugar. Nonetheless they are tasty but if you like chewy biscuits then I'm afraid this recipe isn't for you.
Milo Biscuits - makes 28 biscuits
125g butter
1/2 cup brown sugar
1/2 cup caster sugar
1 tsp vanilla extract
1 egg
1 3/4 cups SR flour
3/4 cup Milo
Preheat oven to 180 degrees and line 3 trays with greaseproof paper.
Cream butter and sugars until thick and creamy. Add extract and egg and beat until well incorporated.
Add flour and Milo and beat until mixture is homogenous.
Roll the dough into walnut-sized balls and place on the trays. Flatten them slightly.
Bake for 12 minutes
Enjoy!
Sarah xx
Sunday, 13 May 2012
Macarons

1. They look so pretty!
2. There are endless possibilities regarding flavours
3. They have a reputation for being difficult to make
4. Everyone will love you for making them!
So this afternoon i was bored so i decided to whip up a batch. I probably shouldn't say whip up a batch because it did take most of the afternoon!
I thought i'd put a bit of a step by step recipe up for these because they really aren't that difficult. You just need to be precise and have patience! This is my favourite macaron recipe. It works the best for me however you do need to own digital scales, a candy thermometer, a food processor and a stand mixer. Although you can probably get away with hand beaters, the scales and thermometer really are vital so i wouldn't try this recipe without them. Additionally a piping bag will make life much easier for you!
Saturday, 26 November 2011
Peanut Butter Choc Chip Cookies
The time had come to bake. The house still reeked of onions and i thought the smell of cookies baking would be the only solution to eliminate the pong. With no butter in the house, options were limited so i went back to an old favourite - peanut butter choc chip cookies. Unless you have been living under a rock you are probably fairly aware of this recipe as it is widely published on the internet. I first saw it on Taste -Peanut butter & choc chip cookies. The great thing about this recipe is that it is gluten free, yet tastes 'normal' and it only has 5 ingredients - peanut butter, brown sugar, bicarb soda, egg and choc chips. You can also make it just with a bowl and spoon! No fancy appliances required!
The result is chewy, moorish cookies perfectly flavoured. The hardest bit? Not eating them all at once!

Sarah xx
The result is chewy, moorish cookies perfectly flavoured. The hardest bit? Not eating them all at once!

Sarah xx
Subscribe to:
Posts (Atom)